In this simple tutorial, I'm going to show how Concrete5 can be extended to integrate a third-party JQuery plugin to enhance an existing module, and then how this can be encapsulated in a package. I'm going to allow the slideshow module to display images using the clean & lightweight Craftyslide plugin, pictured below.

Concrete5 comes shipped with simple slideshow functionality in the form of a block called, imaginatively enough, slideshow. As this is part of the core you can find it in /concrete/blocks/slideshow. It's in the concrete directory to keep it separate from custom code. And some custom code is what we're going to produce - to override the output of that block, and then to encapsulate this into a package.
First Steps
Obviously you'll need to download and install Concrete5. Download Craftyslide from the project page and unpack the archive somewhere.
Creating a Slideshow
Before starting the integration, let's create a simple slideshow using this built-in functionality - once we've built our add-on this can then be re-configured to use Craftyslide. It's probably most appropriate to create a slideshow from a set (rather than all the images in the site!) so let's do that first. From the Dashboard, select File Manager from the left-hand menu. The File Manager lets you manage uploaded files, including images.
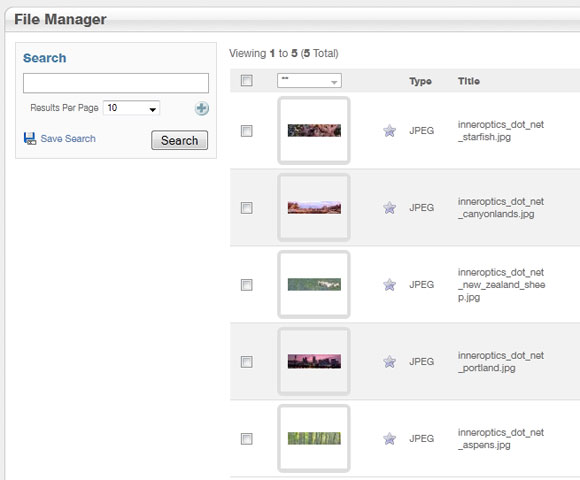
If you don't have any images, add them now. Tick the boxes alongside the images you wish to group in a set, then select Sets in the drop-down at the top of the table of files. You'll get the dialog pictured below.
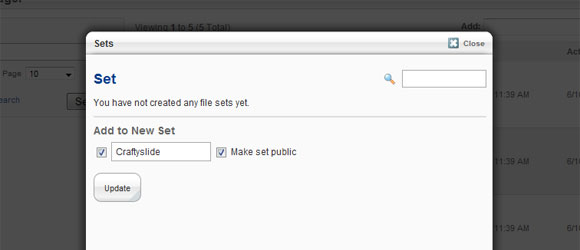
Click the checkbox under Add to a New Set, give the new set a name and click Add (of course, if you have previously added a set it will be available here).
Adding a Title
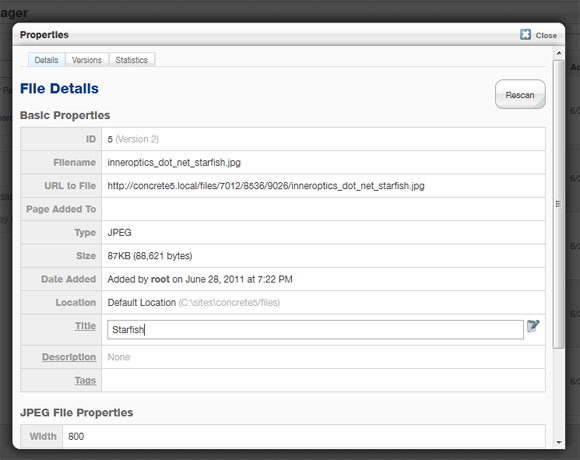
The Craftyslide plugin features a title control (see the picture which introduces this post), so we'll need to assign these to the images in the set. Go back to the file manager, click an image and select Properties. You'll get the dialog shown below; click Title, assign one, click the icon to the right of the input and close the dialog. Repeat for each of your images.
Adding a Slideshow Block
Now that you have a number of images organised into a set, you can use this as the basis for a slideshow block. Navigate to the website (Return to Website from the dashboard), click a region, then select Add Block to bring up the dialog below.
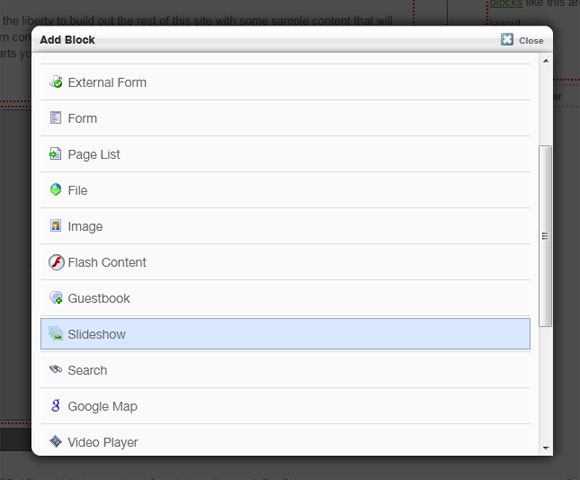
The slideshow block is available out-of-the-box, so select that and you'll get the following dialog.
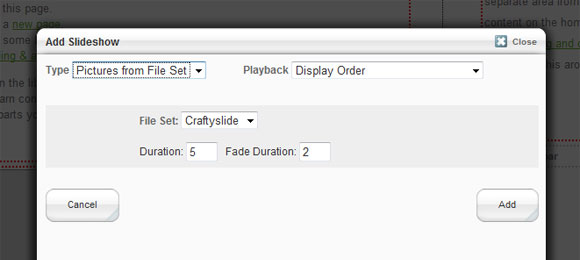
Select the new set you've just created and click Add. At this point, if you go back to the page you added the slideshow to, you should see it in action; what we're going to do now is re-work it so that it uses the Craftyslide plugin.
The Directory Structure
Before we start doing any editing, let's look at the directory structure. The image below shows the structure we're going to create.
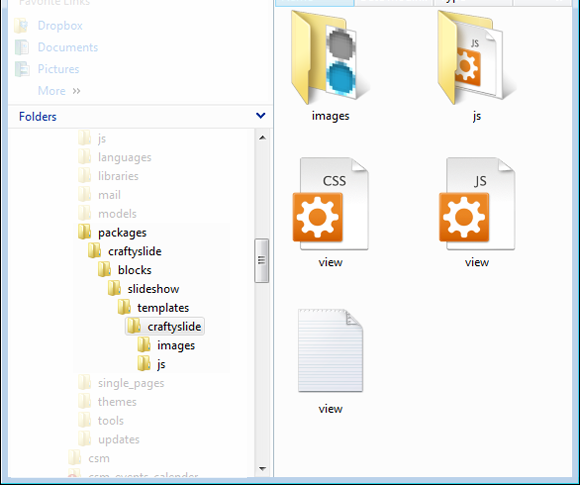
Going from the top-level directory down, here is an overview of the structure. First off, everything goes in the packages directory; not the one which is in concrete as this is reserved for the core files. The package is called craftyslide so that goes next. Our package is encapsulating block-related functionality, so we then have a directory called blocks. Rather than create a new block, however, we're extending the slideshow block, and creating a template, so we put that in a directory named accordingly - templates. The template is going to be called craftyslide to match the name of the package, and it's the name of this directory which is used in the back-end to reference the template, as we'll see later. We create an images directory, and js is named as it is for a reason; any JavaScript files in a directory with that name are automatically included. The structure takes some getting used to, but looking at the structure under the concrete directory and at existing packages helps to understand how it's all organised.
Integrating Craftyslide - Creating the Template
The output from the slideshow block is, by convention, rendered by the file view.php in the /concrete/blocks/slideshow directory. If you open that up you'll notice - amongst a bunch of Javascript that powers it - there's a loop which iterates through the images thus:
foreach($images as $imgInfo){
The default slideshow works by creating skeleton markup, then creating JavaScript code in which the filepaths of the images are embedded programmatically. The Craftyslide plugin, however, works by taking some markup and applying a JQuery function to that markup. As such, we want to do the following (this is saved as /packages/craftyslide/blocks/slideshow/templates/craftyslide/view.php): `
<?php defined('C5_EXECUTE') or die("Access Denied."); ?>
<div id="slideshow<?php print $bID ?>">
    <ul>
    <?php foreach($images as $imgInfo):
        $f = File::getByID($imgInfo['fID']);
        $fp = new Permissions($f);
        if ($fp->canRead()):
    ?>
    <li>
        <img src="<?php print $f->getRelativePath(); ?>" title=<?php print $f->getTitle(); ?>" />
    </li>
    <?php endif; ?>
<?php endforeach; ?>
    </ul>
</div>
I'll go through the important lines.
- line 1 contains a quick check to ensure this file never gets run as standalone script. You'll find this throughout the code.
- In line 2 we create a DIV with a name tied to the block, by appending the block ID - stored in the
$bIDvariable. - In line 4 we start to iterate through the images in our set
- Each element in the array of images contains references to file objects, so line 5 grabs the object that represents the file
- In line 6 we obtain an object which tells us about the permissions on the file object with respect to the current site user, so:
- Line 7 checks that the current user should be able to see this image. (Unpublished images should be hidden from a visitor, for example.)
- In line 10 we create an
imgtag, with the path to the image and the title taken from the current file object.
Integrating Craftyslide - Adding Styles
When creating a block there's a simple convention for applying styles. A file named
view.css in the block's directory will be automatically linked when rendering the block. Copy the file css/craftslide.css from the Craftyslide archive and rename it view.css. This file references one image - pagination.png - so copy that into the block's directory and check that you've referenced it properly in your CSS.
Integrating Craftyslide - JavaScript
We now need to add some JavaScript to make Craftyslide work. There are two things which can help add JavaScript to a block. Similar to the style rules, a file named view.js will automatically be included. Then, any JavaScript files in a directory called js will get added automatically. It might make sense to include the library in the js folder and then initialise the slideshow in view.js - however this won't work for two reasons:
view.jsgets included before thejsdirectory, and therefore the Craftyslide plugin won't be loaded in time.- We created our DIV's ID dynamically using PHP, so we'll need to do the same again for the initialisation function
What we'll do, then, is simply add the code to initialise Craftyslide in the template (view.php), like this:
Note that we're appending the Block ID $bID to create a matching ID. This is the most basic initialisation of Craftyslide, feel free to customise it accordingly. Then to make it work, copy either js/craftyslide.js or js/craftyslide.min.js into your block's js directory. (You're probably best using the minified version, as there is no minifcation out-of-the-box - however there are ways around that.)
Applying the Template
Now that we've created a new template for the Craftyslide plugin, we need to go back to teh slidehsow block we created and apply the template to it, converting it from the out-of-the-box slideshow to a Craftyslide-powered slider. Go to the page you placed the slideshow on, enter edit mode and click the slideshow. From the menu select Custom Template to bring up the dialog shown below.
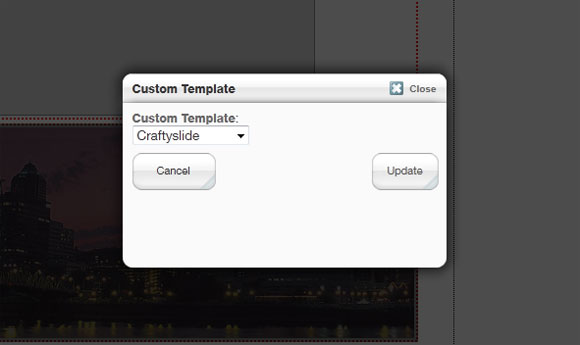
Select Craftyslide and then Update. If you leave Edit mode, you should find that the slideshow block has been replaced by a Craftyslide slider. Let''s now wrap this up in a package, so that this functionality can be encapsulated for use on other projects.
Creating a Package
In order to tell Concrete5 about the package, we create a subclass of Package and save it - perhaps slightly misleadingly - as controller.php in /packages/craftyslide. The contents are shown below. `
<?php
defined('C5_EXECUTE') or die(_("Access Denied."));

class craftyslidePackage extends Package {

    protected $pkgHandle = 'craftyslide';
    protected $appVersionRequired = '5.4.0';
    protected $pkgVersion = '1.0';

    public function getPackageDescription() {
        return t("Integrates the Craftyslide plugin for slideshows");
    }
    public function getPackageName() {
        return t("craftyslide");
    }
    public function install() {
        $pkg = parent::install();
    }
}
As you can see, the new package class defines a number of properties and methods. These should all be self-explanatory.
The install() method would typically carry out tasks such as defining new blocks or jobs, but isn't necessary here - I've included it nonetheless to show where such tasks would go.
Final Steps
Finally, you may (but aren't required to) create an icon which will be displayed in the administrative area (and in the Marketplace, should you wish to distribute your packages) - you simply need to ensure that it is 97px x 97px square, has 4px rounded corners, is named icon.png and is saved in the package's directory.